


THIS ARTICLE MAY CONTAIN AFFILIATE LINKS FOR THE PRODUCTS WE RECOMMEND. IF YOU PURCHASE AFTER LEARNING ABOUT THESE IDEAS ON OUR SITE, WE MAY MAKE A SMALL COMMISSION. THANK YOU FOR YOUR SUPPORT!
In the summer of 2020, we received a request for a custom yellow linen crown to celebrate a little boy's 1st birthday. It was the first crown we ever made at Madly Wish.
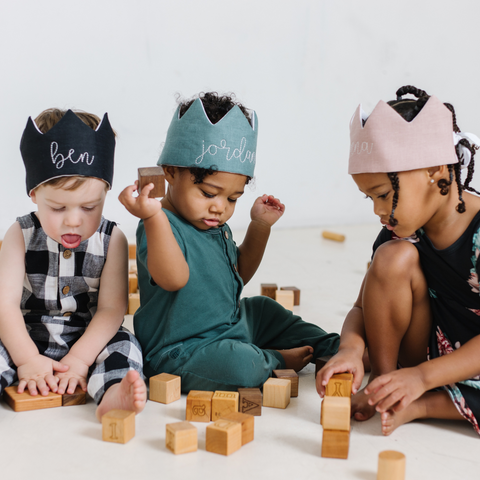
We pretty quickly added crowns to our collection after that & we've never looked back. It's funny how a special request can completely change your business. Our birthday crowns became an instant bestseller, right next to our tooth fairy pillows, and we just keep dreaming up new ideas and reasons to wear them.

While mostly used for birthday parties, I think of the crowns as so much more. They are the perfect accessory for imaginative play. And when personalized, each crown is truly a celebration of your child's uniqueness and individuality.
A child's name is deeply personal and is symbolic of their identity. It shapes them, their self-confidence and their future because children begin to recognize their name by around the 9mo mark. The story of life begins with a child's name.
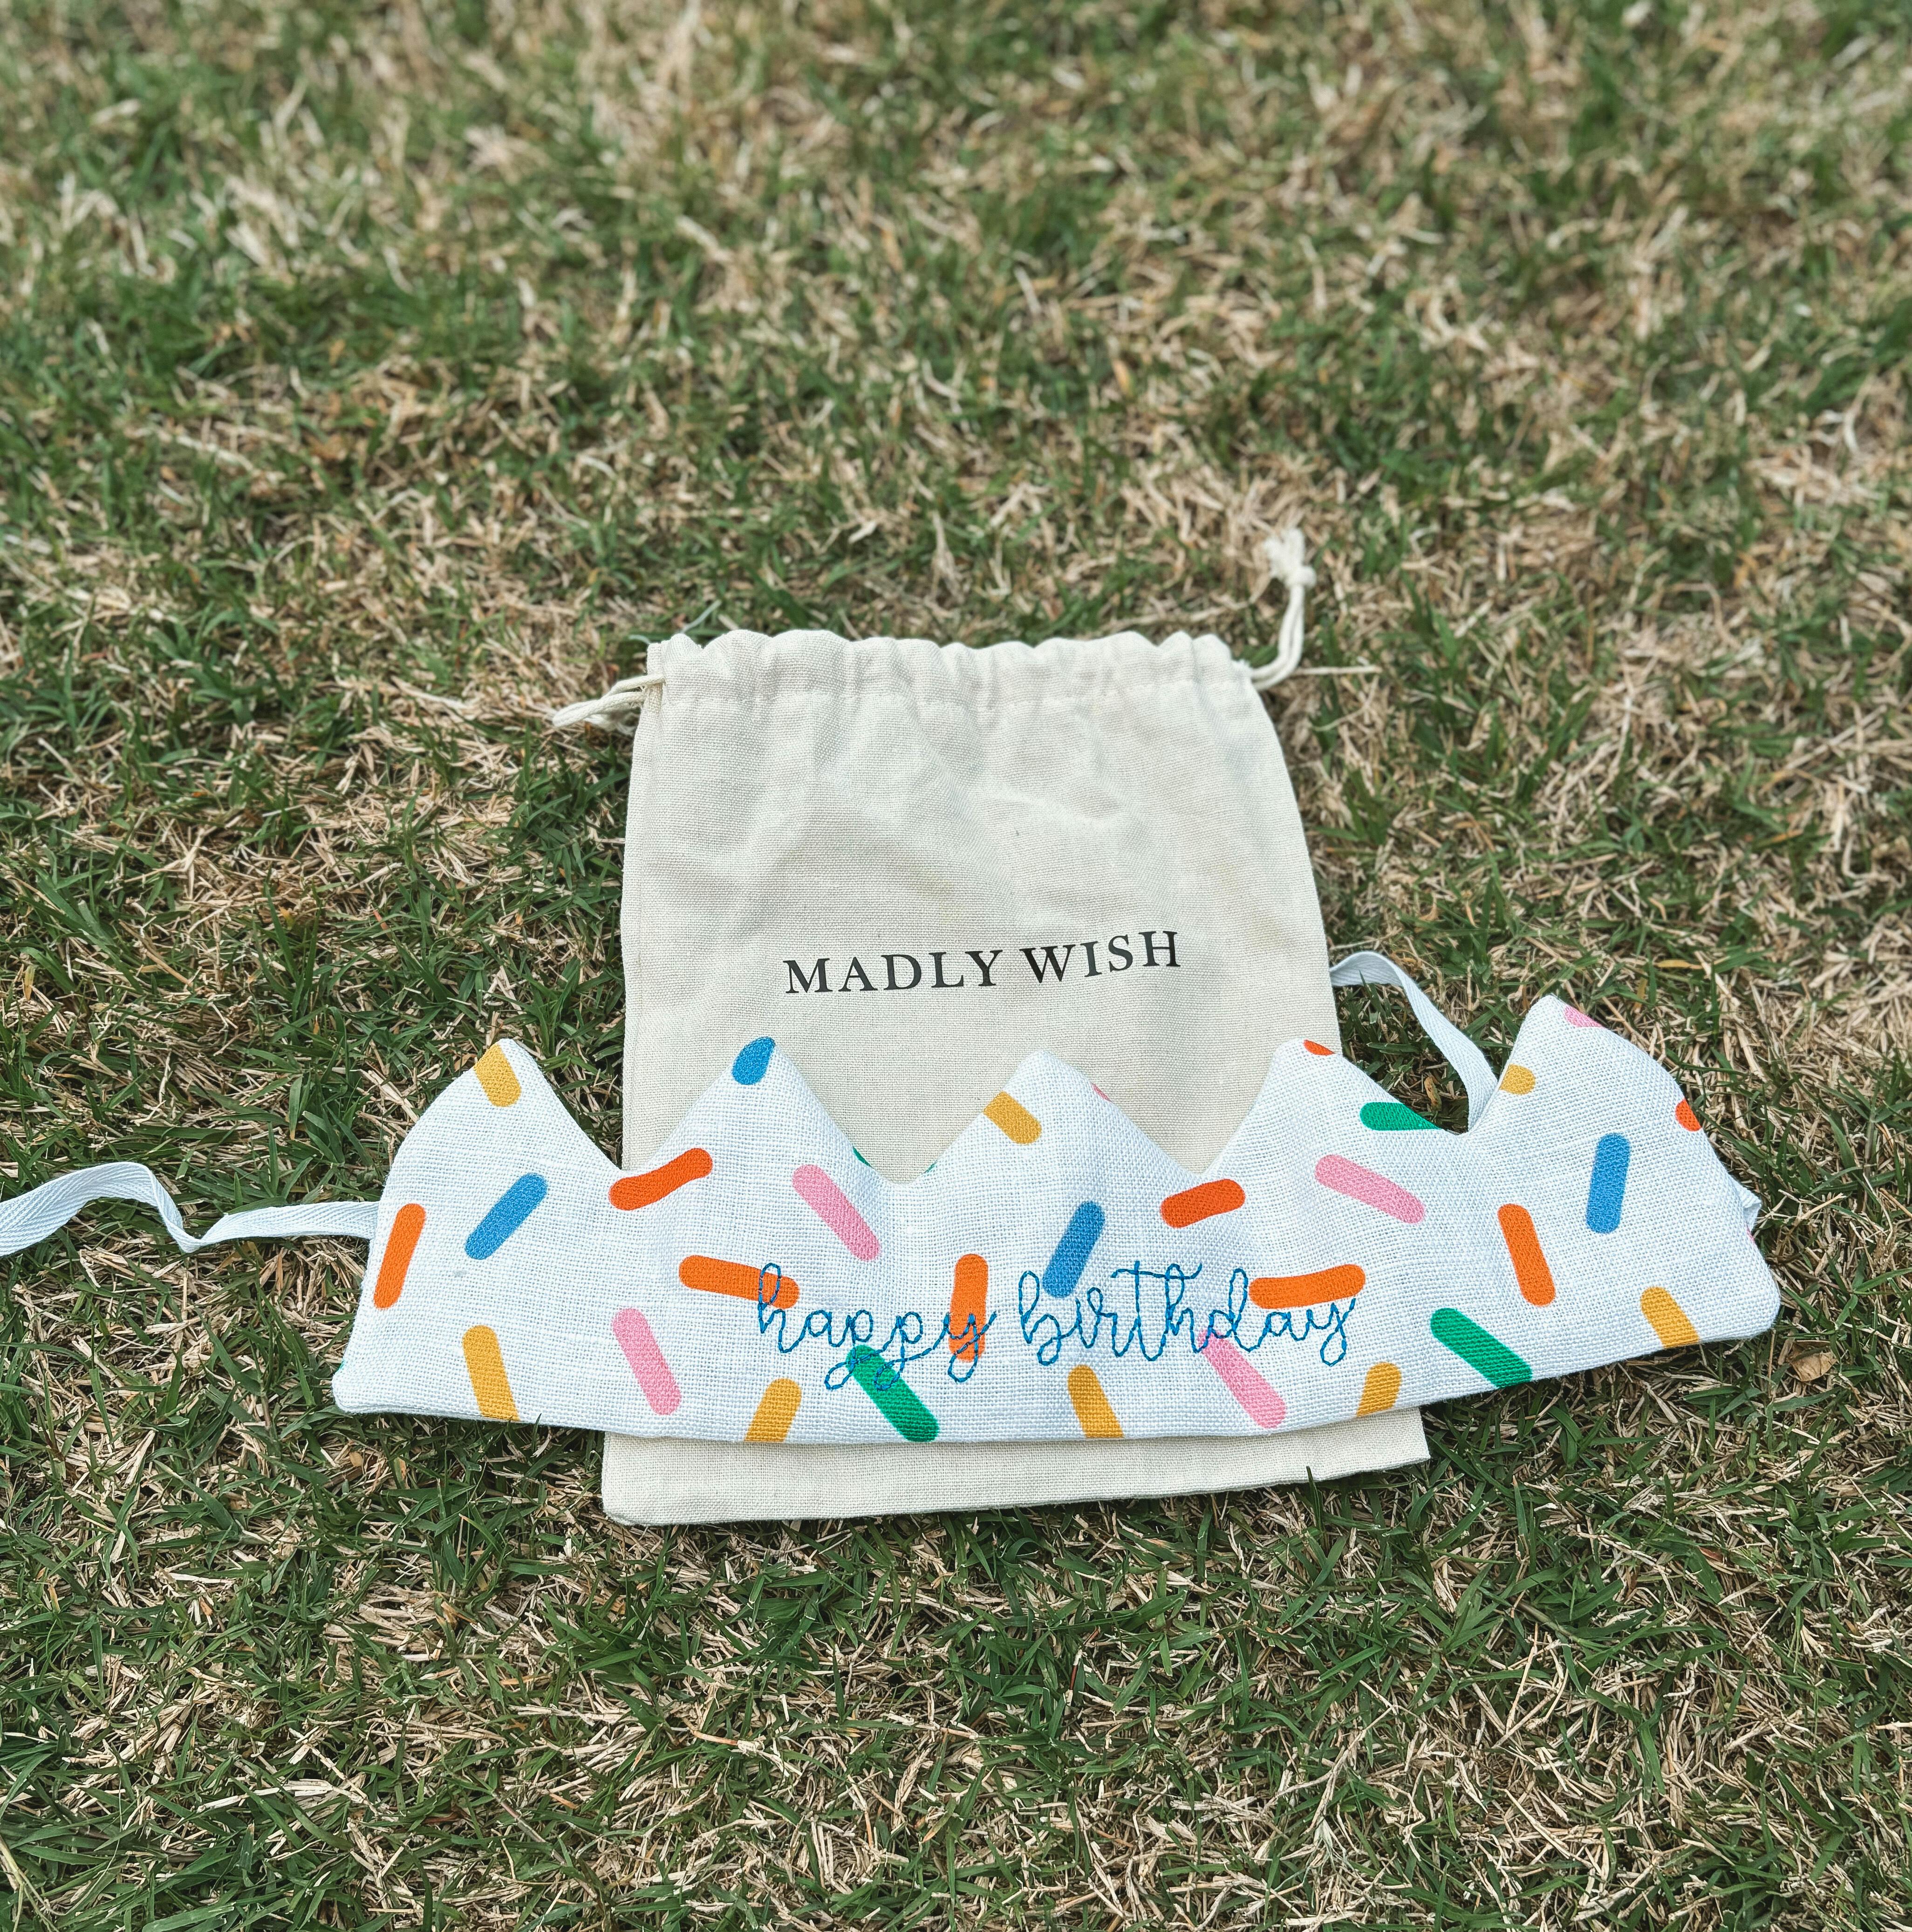
Our crowns are a reflection of that. So, whether you choose to make a crown for a birthday or as a fun way to encourage child-led play, I'm excited to share this easy tutorial and crown template with you today. I hope you enjoy it!

How To Make A Fabric Crown - With Free Crown Sewing Pattern
You can make a crown with whatever materials you have handy. A felt crown is a popular option today that doesn't require use of a sewing machine. Our crown template will work well if you want to make a felt or paper crown. But I'll be sharing a pattern and directions to sew your own. Please feel free to take the parts of this tutorial that are relevant to your needs and supplies. Let your creativity run wild!
DIY Crowns and Tiaras for Kids & Adults
This template will help you make one crown that is adjustable in length and fits children 12 months old - adults. Ready? Let's begin!
Supplies
-
Two pieces of fabric, any kind you like, that measure about 6" x 20"
-
1 piece of batting about the same size as your fabric
-
30" piece ribbon or similar for the ties
-
Matching thread
-
Sewing machine
-
Basting spray (optional)
-
Iron

Print out the Template
Print out the template linked here on card stock if you have it available. If not, regular printer paper will be just fine. Please note, we're providing this free crown template as a DIY. Kindly do not sell the printed pattern as your own. It is intended for personal, not commercial use. 🪡
How to Sew a Fabric Crown
-
Fold the fabric you've chosen for the front of your crown in half lengthwise and press.
-
Use the fabric pen to trace the crown template onto the front of your fabric by lining up the fold with the left edge of the pattern. (If you're comfortable, you can also use a rotary cutter and skip the tracing altogether. But, please watch your fingers!)
- Open up the crown front and press it again to smooth out the fold you created initially.
-
Take the piece you've saved for the back of your crown and lightly apply basting spray to the wrong side.
-
Lay the batting on the wrong side of the fabric you just sprayed. Then flip over your rectangle and press onto the right side of the fabric to bond the batting and back piece together. (Basting spray isn't necessary. If not using, just lay the batting out on your workspace and place the back piece of your crown on top, right side up.)
-
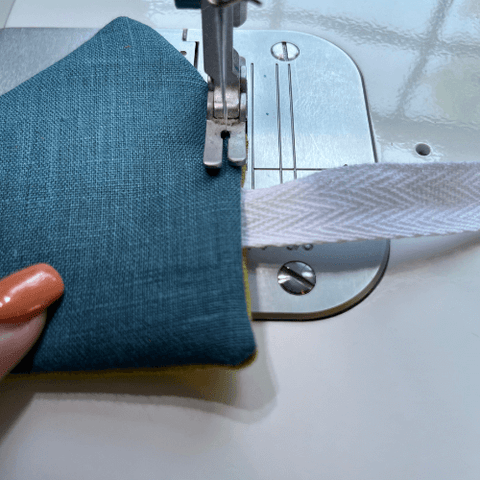
Cut your ribbon in half leaving you with two 15" pieces. (We use cotton twill tape for our ties. At this point we fold over the edges of the twill twice, about 1/2" each time. Then stitch in place. If using ribbon, you can choose how to finish the edges. Heat seal, tie a knot or any other method you prefer.)

-
Stitch one raw edge of the tie to the middle of the crown on the right side of the front piece about 1/8" from the edge.
-
Lay the top of your crown onto the back piece/batting of your crown, right sides together. Pin in place, but be careful not to pin through the tie.


-
Starting on the right side of your crown sandwich, stitch with a 1/4" seam allowance as indicated below. Make sure to backstitch at the opening.


-
Trim the seam allowance and tops of each point leaving your stitches intact.

-
Carefully turn the crown by pulling on the tie inside. (You're almost there!)

-
Gently poke out the points and corners of the crown.

-
Press your crown and fold the edges of your opening in.

-
Insert the second tie into the crown opening, matching the placement of the first, and top stitch.

Your fabric crown is finished!
The rest is up to you. Feel free to decorate your crown any way you'd like. Your king or queen might enjoy wearing glitter, sequins, poms or other fun accessories. These can be applied with glue or hand stitching if you prefer. If you'd like a simple, cute crown, add some embroidery or leave as is. You can always come back later and decorate it even more to your liking.
I'd love to see what you create. Please tag us on IG @madlywish or send us an email with a picture (hello@madlywish.com). Thanks for following along!
Comments
Lexi
What are the measurements of the pattern? I don’t own a printer to use the template.
February 17, 2024
Leave a comment